Cannot boot your computer anymore after installing Windows 10 anniversary update? Get stuck in the boot or stuck on startup while your are trying to boot Windows 10? If you are facing with computer stuck with Windows 10 freezes & crashes at startup after installing anniversary update issue, you may follow below offered solutions to fix this problem on your own now.
Solution 1. Reboot PC with Windows 10 bootable disk
Solution 2. Remove apps that lock Windows from booting
Solution 3. Change startup field value for the appXsvc registry entry
Solution 4. Enable HIPM and DIPM
If you prefer a simple and effective method, Solution 1 and Solution 2 shall help. Let’s see the exact solutions and you may choose the most suitable one to fix your problem with Windows 10 freeze and crash at startup error now.
Solution 1. Reboot PC with Windows 10 bootable disk
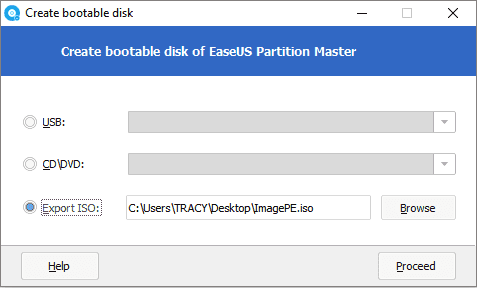
This method requires you to have a bootable disk with Windows 10 anniversary update ISO image on it. You can apply EaseUS Partition Master to create a bootable disk with a healthy computer which installs anniversary update of Windows 10. Then you can boot your PC without any problems:

- Connect the bootable disk with your computer and reboot it;
- Select to boot from EaseUS Partition Master bootable disk;
- Follow the on-screen guidance and you’ll get your computer to boot up then.
Solution 2. Remove apps that lock Windows from booting
If you are using SSD as boot drive for Windows 10 and set HDD as a storage drive for apps, this may lead to system freeze and crash. The best way is to remove the apps in system C:/ drive.
Solution 3. Change startup field value for the appXsvc registry entry
- Boot PC into safe mode;
- Press Win + R, type: regedit and click OK;
- In the left pane of Registry Editor, go to: HKEY_LOCAL_MACHINE\SYSTEM\ControlSet001\Services\AppXSvc;
- Double click on Start and change the value data to 4, click OK;
- Restart system and boot to normal mode.
Then you can restart computer and enjoy Windows 10 without any problems.
Solution 4. Enable HIPM and DIPM
Do make sure that your drive support HIPM and DIPM with a SATA connection to AHCI mode which is enabled in the BIOS.
- Open Control Panel and click Power Options;
- Click on Change plan settings and then click Change advanced power settings link;
- Double click + icon to expand all items under hard disk option, change setting of "AHCI Link Power Management - HIPM/DIPM" to Active;
- Click Apply and OK.
